Why Make Vegan Ice Cream Without an Ice Cream Maker?
Convenience Over Complexity
Let’s be honest—who wants another kitchen gadget collecting dust? Ice cream makers are one of those things that sound like a good idea, until you realize they’re bulky, overpriced, and oddly needy. The bowl needs to be frozen overnight. The base has to be prepped just right. And if you’re lucky, you get a pint of icy sorbet after all that effort. Honestly, hard pass.
No-churn vegan ice cream, on the other hand? It’s the laid-back cousin of traditional recipes. You don’t need fancy tech. You don’t need culinary school credentials. All you need is a blender (or a food processor), a freezer, and a little imagination. Whether you’re whipping up a batch after dinner or getting creative with weekend flavors, it’s as simple as blend, freeze, and eat.
- No extra machines – more counter space, less clutter
- Quick setup – skip the overnight chilling and go straight to mixing
- Easy cleanup – fewer parts, fewer headaches
- Experiment-friendly – try wild combos without committing to a whole tub
💡 Pro tip: No-churn ice cream is perfect for small batch flavor experiments—get weird with it and discover your next obsession.
Delicious Results Without the Fuss
You might be wondering—can ice cream without churning really hold its own? Surprisingly, yes. When you use rich ingredients like full-fat coconut milk or ripe bananas, the final result is smooth, flavorful, and totally scoopable. There’s no compromise on texture. And the flavor? Better than anything in a plastic tub from the store.
People often say they didn’t expect much the first time they tried a no-machine version. But then they taste it—and everything changes. It’s fresh. It’s vibrant. It doesn’t have that weird gummy or overly sweet aftertaste that you get with some commercial brands. And since you’re the one making it, you control how sweet, creamy, or wild it gets.
The little touches go a long way: letting the mixture rest before freezing, stirring it halfway through, or folding in crushed nuts or ribbons of fruit jam. These are the tweaks that transform something simple into something you can’t stop scooping.
Essential Kitchen Tools for No-Churn Vegan Ice Cream
Minimal Equipment, Maximum Flavor
Good news—there’s no gadget shopping spree required. If you’ve ever made a smoothie or mashed a banana, you’re already halfway there. Here are the basics that’ll make your ice cream game strong without complicating your life.
- Blender or Food Processor: Your main tool for turning raw ingredients into silky bases
- Mixing Bowls: Great for combining mix-ins and swirling in flavors
- Freezer-Safe Containers: Choose something with a tight seal to prevent ice crystals
- Loaf Pans or Molds: Ideal for easy freezing and clean scooping
- Spatula: Because leaving any behind in the blender is basically a crime
- Ice Cube Trays (Optional): Handy for portioning, or freezing leftover base for later fun
| Tool | Purpose | Why It Matters |
|---|---|---|
| Blender | Blends fruits, nuts, milks | Needs power for smooth texture |
| Food Processor | Works with thicker mixes | Best for dense bases like cashews |
| Loaf Pan | Holds and chills the mix | Metal freezes faster, ideal for quick batches |
| Airtight Container | Storage | Keeps texture smooth, prevents flavor loss |
💡 Pro tip: Stick your container in the freezer while you prep—it speeds up the initial chill and cuts down on crystal formation.
No-Churn Base Options That Work Every Time
Frozen Banana “Nice Cream”
Bananas are the no-churn MVPs. Freeze them, blend them, and you’ve got instant soft serve with no dairy in sight. They’re naturally sweet, easy to work with, and flexible enough to take on any flavor direction you want.
Flavor pairings:
- Mixed berries for a tart twist
- Cocoa powder for a chocolatey treat
- Peanut or almond butter for something rich and nutty
Coconut Milk or Coconut Cream
Want that creamy, scoopable texture that feels almost too rich to be dairy-free? Coconut milk (specifically the full-fat, canned kind) is your best bet. It’s thick, luxurious, and pairs beautifully with tropical fruits, chocolate, and warm spices.
Quick tip: Pop the can in the fridge overnight and scoop out the thick part—it’s like ready-made whipped cream in a can.
Soaked Cashew Blends
Cashews are surprisingly versatile. Once soaked and blended, they make a smooth, neutral base that’s easy to build on. Think of them as the blank canvas of vegan ice cream—they’ll take on whatever flavor you throw at them.
- Soak raw cashews in water (4–6 hours)
- Drain and blend with oat milk or coconut cream
- Add in flavor boosters like cinnamon, vanilla, or espresso
💡 Pro tip: Salt isn’t just for savory food. A pinch of sea salt makes sweet flavors pop—especially in nut-based blends.
Oat Milk & Nut Butter Combos
If bananas aren’t your jam and coconut’s too rich, oat milk plus nut butter is your next best thing. It’s creamy, a little earthy, and easy to tweak. Add a frozen banana if you want more body, or toss in a date or two for sweetness.
Best for:
- Chocolate espresso blends
- Toasted coconut with vanilla
- Salted caramel-inspired flavors
Choosing the Right Sweetener (No Refined Sugar Needed)
Natural Sweeteners That Complement Vegan Bases
Refined sugar? Hard pass. Plant-based sweeteners bring not only flavor, but richness, warmth, and sometimes even nutrients to your frozen dessert. Each one plays its part in the final taste.
- Maple syrup: Deep, earthy sweetness. Think fall flavors—cinnamon, pecan, or chai.
- Agave nectar: Smooth and gentle. Plays well with tropical fruits and bananas.
- Medjool dates: Blend into bases for natural caramel flavor and added fiber.
- Stevia or monk fruit: Use sparingly. Good for low-glycemic recipes.
| Sweetener | Flavor Profile | Best Paired With |
|---|---|---|
| Maple syrup | Warm, caramelized | Pumpkin, cashew, cinnamon |
| Agave nectar | Mild, neutral | Coconut milk, banana |
| Medjool dates | Rich, toffee-like | Peanut butter, cocoa, vanilla |
| Stevia/Monk Fruit | Sweet, low-calorie | All bases (small amounts) |
💡 Pro tip: Always blend and taste your base before freezing—frozen flavors can dull slightly.
How to Adjust Sweetness to Taste
One of the joys of homemade vegan ice cream is the control you get. Not too sweet? Add a date or a touch more syrup. Too much sweetness? A squeeze of lemon or a pinch of salt can help level things out.
- Start small with sweeteners and build up gradually
- Use tart fruits like raspberries to balance overly rich bases
- Layer flavors—sweet plus spice or sweet plus citrus
Delicious Flavor Variations to Try at Home
Chocolate Peanut Butter
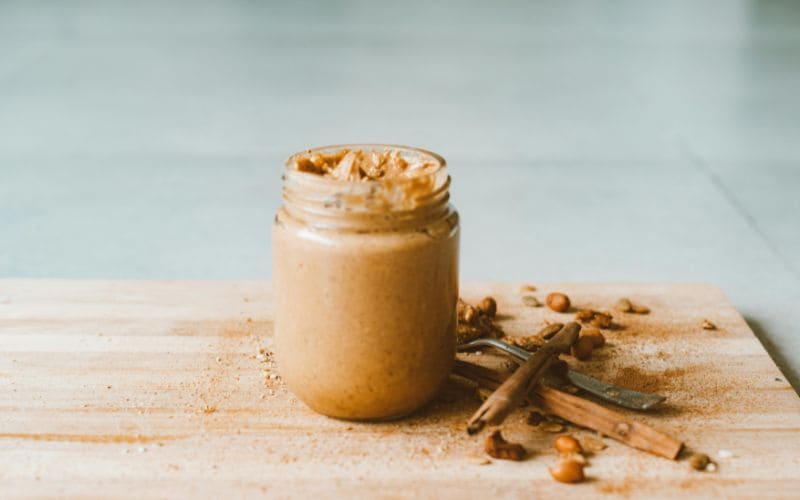
Imagine your favorite candy bar got a wholesome, frozen makeover. That’s this flavor in a nutshell. Start with a velvety base—either two frozen bananas for a natural sweetness, or a chilled can of rich coconut milk if you’re going for that scoop-shop creaminess. Then in goes the cocoa powder, giving everything a deep chocolate backbone. The peanut butter brings the salt and the fat, perfectly rounding it out. Maple syrup ties it all together, and a handful of chocolate chunks or crushed peanuts makes it downright addictive.
- 2 frozen bananas or 1 can full-fat coconut milk
- 2 tbsp unsweetened cocoa powder
- 2 tbsp natural peanut butter
- 1 tbsp maple syrup (or to taste)
- Optional: crushed peanuts or dark chocolate chunks
Mango Coconut Dream

This one tastes like sunshine. It’s bright, tropical, and so easy to throw together that you’ll wonder why you ever bought store-bought sorbet. Frozen mango gives it a naturally smooth texture, and full-fat coconut milk brings the tropical vibe full-circle. A splash of lime juice perks it up. A few shreds of toasted coconut? Total game-changer. It’s beach-in-a-bowl stuff, no blender drama required.
- 2 cups frozen mango chunks
- 1 cup full-fat coconut milk
- 1 tsp vanilla extract or 1 tbsp lime juice
- Optional: toasted coconut flakes for crunch
💡 Pro tip: Freeze mango chunks on a flat tray first—they blend smoother and faster that way.
Mint Chocolate Chip
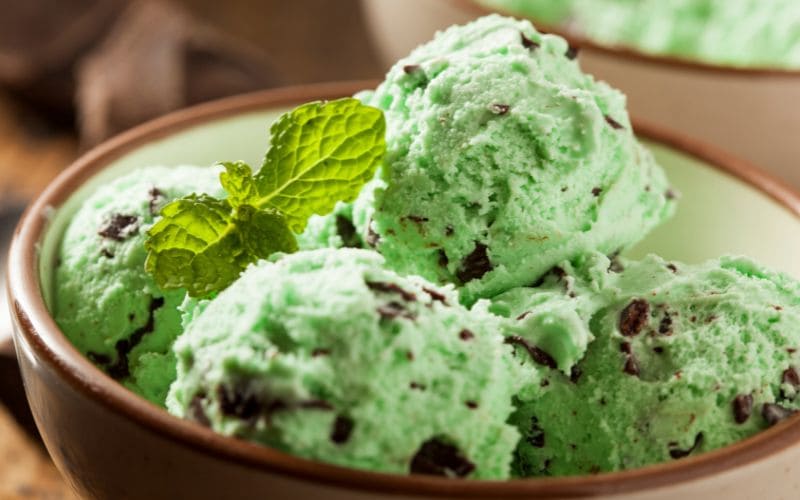
Think refreshing and chocolatey. Think of the ice cream you used to get in a cone as a kid—only now it’s dairy-free and guilt-free. Bananas give it that base, or go with coconut milk if you want more indulgence. A dash of peppermint extract brings the chill, and chopped dark chocolate adds those irresistible pockets of crunch. For the brave, a tiny bit of matcha or spinach makes it green without tasting like greens.
- 2 frozen bananas or 1 can coconut milk
- 1/4 tsp peppermint extract
- 1/4 cup chopped dark chocolate
- Optional: matcha powder or spinach (for natural color)
Strawberry Vanilla Swirl
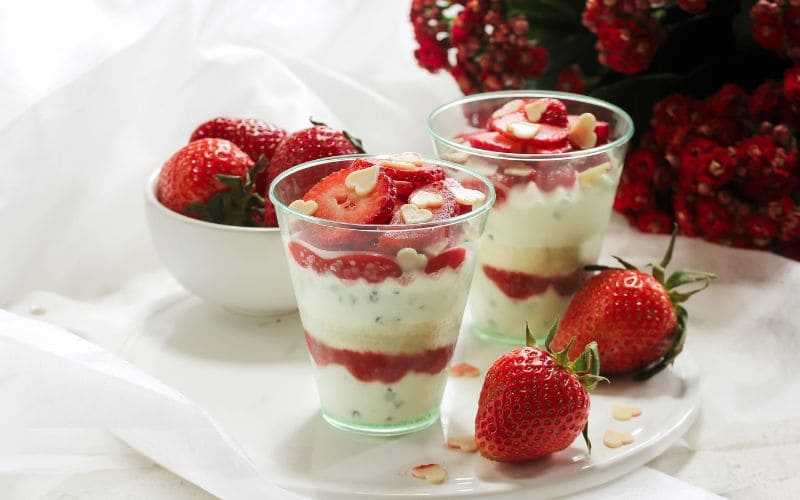
There’s something timeless about strawberries and vanilla. This combo brings all the charm of classic ice cream with none of the dairy. Oat milk creates a light and creamy backdrop, while ripe strawberries steal the show. Vanilla gives it that warm, familiar note, and for extra flair, swirl in roasted strawberry compote or a hint of lemon zest. It’s like summer picnic vibes in a frozen dessert.
- 2 cups ripe strawberries (fresh or frozen)
- 1 cup oat milk
- 1 tsp vanilla extract
- Optional: lemon zest or roasted strawberry compote
Espresso Almond Fudge
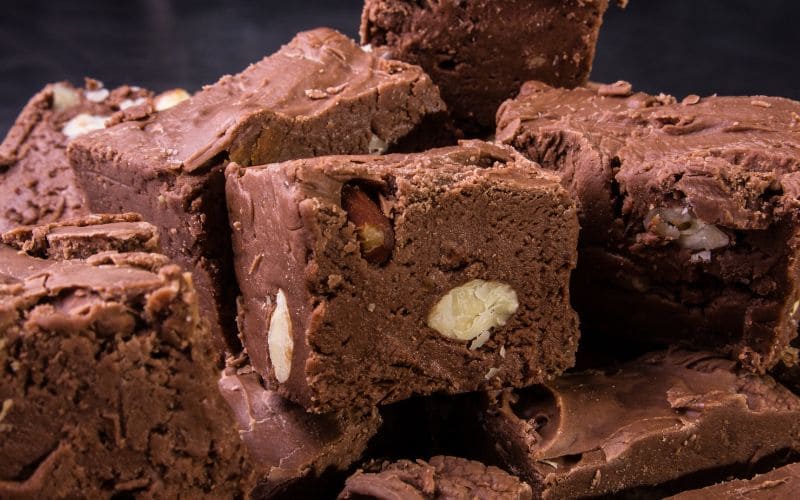
This one’s not messing around. It’s for the coffee lovers, the dark chocolate fans, the people who want a little bitterness with their sweetness. Bananas or a cashew cream base gives you the body. Add a shot of espresso to wake things up and almond butter for depth. A drizzle of agave smooths the edges. Toss in some cacao nibs or homemade fudge for texture, and boom—you’ve got dessert with an edge.
- 2 frozen bananas or 1 cup cashew cream
- 1 shot espresso (cooled)
- 2 tbsp almond butter
- 1 tbsp agave nectar
- Optional: cacao nibs or fudge ribbons
Pro Tips for the Creamiest Vegan Ice Cream Texture
If you want that dreamy, scoopable consistency—the kind where your spoon glides through like butter—these little hacks go a long way. Fat is your best friend here. Coconut cream, nut butter, or soaked cashews bring richness and stability. Folding in air before freezing gives it lift, almost like churning would. Over-blending? That’s a common misstep. It heats things up and ruins the texture. And don’t overlook alcohol: just a teaspoon or two of vodka lowers the freezing point and keeps things from going icy. No taste, just results.
- Use rich bases like coconut cream or cashew for a velvety texture
- Fold in some air post-blending to mimic churned fluffiness
- Avoid overheating by pulsing instead of blending on high for too long
- Cover your mixture with parchment before sealing to block out ice crystals
- Add a touch of alcohol to improve softness and scoopability
💡 Pro tip: If you can’t scoop it, you can’t love it. Texture is everything—build it right from the start.
How to Store and Keep Your Vegan Ice Cream at Its Best
Storage Guidelines
So you’ve nailed the texture and flavor—now what? Proper storage is the difference between creamy perfection and a rock-hard block of regret. Air is your enemy here. It encourages freezer burn and turns your dreamy dessert into an icy disappointment. The solution? Store it like a pro.
Pick containers that are airtight and freezer-safe—glass or silicone work beautifully. Fill them almost to the top, leaving as little air space as possible. Always cover the surface of your ice cream with a layer of parchment or wax paper before sealing the lid. This keeps moisture and crystals out, preserving that smooth, rich texture you worked so hard to get. And don’t forget to label. It’s easy to lose track when your freezer’s a mix of mystery meals.
- Choose airtight containers (glass or silicone preferred)
- Leave minimal air space to prevent freezer burn
- Label each container with date and flavor
- Place parchment or wax paper directly on the surface before sealing
| Storage Type | Best For | Notes |
|---|---|---|
| Airtight plastic | Short-term storage | Easy to stack but may allow slight flavor absorption |
| Metal loaf pan | Fast freezing | Cover tightly with foil or wrap to avoid ice buildup |
| Silicone trays | Portioning & single servings | Great for smoothies or mix-ins |
Shelf Life and Refreshing Frozen Portions
Not all no-churn bases age the same way in the freezer. Banana-forward blends are best eaten within three to five days—they tend to change flavor and texture quickly. Coconut or cashew-based recipes hold up better, staying delicious for up to 7 to 10 days. Oat or nut milk-based versions fall somewhere in the middle, and should ideally be enjoyed within a week.
If your ice cream becomes too hard to scoop, let it rest at room temperature for 10 to 15 minutes. Still too icy? A quick pulse in the blender with a splash of plant milk can bring it back to life.
- Banana-based: enjoy within 3–5 days
- Coconut or cashew: best up to 7–10 days
- Oat milk or nut milk: use within a week
💡 Pro tip: Keep your ice cream near the back of the freezer—it’s colder and more consistent back there.
Quick Troubleshooting for Common Mistakes
Even the most delicious recipes can go sideways. But the good news? Most ice cream issues are easy to fix. Here’s how to rescue your batch when things don’t go as planned.
- Icy texture? Add more fat (like nut butter or coconut cream) and reduce water-based ingredients.
- Too bland? Boost the flavor with spices, citrus zest, or a touch more sweetener.
- Too strong? Balance intense ingredients by blending with banana or oat milk bases.
- Rock solid and unscoopable? Let it sit for 10 minutes, or re-blend with plant milk to soften.
Beginner-Friendly Vegan Ice Cream FAQs
Can I make this with only a blender?
Absolutely. A good high-speed blender works wonders, especially for banana and cashew-based recipes.
Can I use almond milk instead of coconut milk?
You can, but almond milk is thinner. To get a creamy result, mix in banana, nut butter, or avocado.
How do I prevent freezer burn?
Seal your containers well and place parchment directly on the ice cream’s surface to keep air and moisture out.
What’s the best way to make it scoopable?
Use high-fat ingredients and give it a few minutes at room temp before scooping. No jackhammer required.
Can I add alcohol?
Yes! A teaspoon or two of vodka or coffee liqueur keeps your ice cream softer without changing the taste too much.
Final Thoughts: Make Your Own Vegan Frozen Treats with Confidence
No ice cream maker? No problem. You’ve got everything you need to create incredible dairy-free desserts right in your own kitchen. The tools are simple. The ingredients are flexible. And the possibilities? Limitless.
Whether you’re dreaming of espresso fudge swirls or mango-coconut bliss, these no-churn recipes let you play, personalize, and enjoy frozen treats on your own terms. Forget store-bought pints full of mystery gums and preservatives—this is plant-based indulgence done right.
💡 Pro tip: Treat your freezer like your pantry—keep a few prepped bases on hand so you’re never far from your next scoop.