Introduction
You know that moment in the middle of the day—your stomach grumbles, your energy dips, and you’re standing in the kitchen staring into the void of your snack cupboard? Yeah, we’ve all been there.
And more often than not, what we find is either full of sugar, packed in plastic, or… disappointingly bland.
But imagine reaching for something you actually made yourself. Something that tastes good, fills you up, and doesn’t come with a side of guilt. That’s where vegan granola bars come in.
These aren’t just some Pinterest fantasy or health-food trend—they’re practical. Real food you can hold in your hand. Real energy from oats, seeds, and natural sweeteners. No dairy, no drama. Just a snack that works with your life, not against it.
They’re the kind of thing that makes you feel like you’ve got it together… even if everything else is on fire.
Whether you’re completely new to the world of homemade snacks, or you’re looking to ditch overpriced supermarket options, you’re in the right place.
In the next few minutes, I’ll walk you through why these bars deserve a permanent spot in your kitchen. You’ll learn about the ingredients that actually do something for your body, how to make them chewy or crunchy depending on your vibe, and how to store them so they don’t end up forgotten in the back of the fridge.
Oh, and don’t worry—there are 7 easy, no-nonsense recipes coming up too. No fancy equipment. No culinary degree required.
Just simple, plant-based goodness. Let’s do this.
💡 Pro tip: Homemade vegan granola bars are cheaper, cleaner, and more customizable than anything you’ll find in stores.
Why Vegan Granola Bars Make the Perfect Snack
They’re More Than Just a Trend—They’re Functional Fuel
Let’s be real: some snacks feel healthy but leave you hungry again in twenty minutes. Others are tasty but loaded with things you can’t pronounce.
Vegan granola bars are different. When done right, they’re a legit source of long-lasting energy. They actually earn the title snack, not just filler.
Here’s why they work so well:
-
Oats: These are your slow-burning carbs. They keep you full, help with digestion, and don’t spike your blood sugar like most “energy” bars.
-
Nuts and seeds: Almonds, chia, flax, pumpkin seeds—pick your favorites. They pack in plant-based protein and those feel-good fats that keep your brain sharp and cravings in check.
-
Dried fruits: A handful of dates or raisins isn’t just for sweetness. They bring fiber, iron, and that satisfying chew that makes each bite feel like a treat.
-
Natural sweeteners: Think maple syrup, agave, or mashed banana. These offer sweetness without the crash, and they’re miles better than refined sugar when it comes to blood sugar balance.
Let’s break that down:
| Nutrient | Why It Matters | Common Sources |
|---|---|---|
| Fiber | Keeps digestion moving and helps you stay full | Oats, flaxseed, dried fruit |
| Protein | Supports muscle repair, keeps energy steady | Nuts, seeds, nut butter |
| Healthy Fats | Good for brain health and staying satisfied longer | Almonds, chia seeds |
| Natural Sugars | Gentle energy release—no spikes, no slumps | Dates, maple syrup |
Now think about what that means in real life.
You eat a bar at 8 a.m. before a long commute. You’re not starving again by 10. You pop one in your bag before the gym, and you actually have fuel to finish your session. You send one with the kids to school, and you don’t hear “I’m hungry” the second they walk back through the door.
This isn’t marketing fluff. It’s what happens when you give your body the nutrients it actually needs.
💡 Pro tip: The best vegan granola bars balance carbs, fat, and protein to keep you energized without sugar crashes.
Grab-and-Go Without the Guilt
Here’s something you’ll love: these bars don’t require refrigeration, they don’t melt in your bag, and they definitely don’t come wrapped in three layers of plastic.
They’re low-maintenance like that.
You can make a batch on Sunday and keep them handy for the week. Whether it’s:
-
Tossing one into a work lunch
-
Packing a few for a road trip
-
Throwing one in your gym bag for later
-
Or sneaking one from the pantry at midnight (hey, no judgment)
They’re right there when you need them. And storing them? Easy. Wrap them in parchment or reusable wax cloths, slide them into a container, and boom—done.
Also, if you’re trying to cut down on packaging waste, this is a small win that adds up fast.
💡 Pro tip: Make a double batch and store extra bars in the freezer—just thaw one when you’re on the go!
Customizable to Fit You (Not the Other Way Around)
Food shouldn’t feel like a compromise. And with these, it doesn’t have to.
The beauty of vegan granola bars is that they bend to your rules. Allergies, sensitivities, preferences—they’ve got you.
Try these easy swaps:
-
No gluten? Use certified gluten-free oats.
-
No nuts? Sunflower seeds, pumpkin seeds, or even tahini work wonders.
-
Watching sugar? Skip the syrups. Use date paste, mashed banana, or just go fruit-only.
-
Need more protein? Add hemp seeds or a scoop of vegan protein powder to the mix.
You don’t have to follow some rigid recipe. In fact, the best versions usually come from experimenting. Toss in what you like. Leave out what you don’t. That’s the kind of flexibility you’ll never get from a packaged bar.
💡 Pro tip: Tailor your granola bar mix-ins to your mood or the season—think pumpkin spice in autumn or coconut-lime in summer.
What You Need to Make Vegan Granola Bars
The Base: Simple Ingredients, Big Role
Let’s be honest—half the reason people don’t make their own snacks is because they think it’s complicated. But here’s the truth: making vegan granola bars is about as simple as making a cup of tea. You don’t need fancy tools or obscure ingredients. You need the basics.
Everything starts with the foundation. These are the ingredients that do the heavy lifting: they create structure, texture, and flavor before you even get creative with the add-ins.
-
Rolled oats: Old-fashioned oats are the classic base. They soak up flavor, offer that hearty bite, and bind together beautifully—plus, they’re inexpensive and easy to find.
-
Nut or seed butters: This is your glue and your flavor booster. Whether you’re into peanut, almond, cashew, or sunflower seed butter, each one adds creaminess and richness.
-
Liquid sweeteners: Maple syrup, agave, or brown rice syrup keep everything cohesive while offering that touch of sweetness without using processed sugar.
And if you want to level things up, there are a few extras worth trying:
-
Puffed grains (like puffed rice or millet): These bring lightness and crunch, so things don’t get too dense.
-
Quinoa flakes: More protein, subtle nuttiness, and extra fiber in one go. A small addition can elevate the entire batch.
💡 Pro tip: Use old-fashioned rolled oats, not quick oats—they give better texture and hold up beautifully.
All together, these ingredients build a bar that actually sticks together, tastes satisfying, and doesn’t fall apart the moment you bite into it. Sounds like a win, right?
Flavor and Texture Boosters That Make It Yours
Now here’s where it gets fun—once you’ve nailed the base, you get to play.
The beauty of DIY granola bars is that they don’t have to taste the same every time. With a few add-ins, you can make bars that feel seasonal, nostalgic, or just straight-up indulgent. Mix and match depending on what you’re craving (or what’s hiding in the back of your cupboard).
Try adding:
-
Dried fruits – Dates for stickiness, cranberries for tartness, apricots for chew. Choose what you love.
-
Chocolate chips or cacao nibs – Want a little indulgence? These add richness without needing dairy.
-
Shredded coconut – Light and tropical, it also adds extra chew.
-
Spices – A pinch of cinnamon, nutmeg, or ginger makes things cozy and adds complexity.
-
Extracts – A splash of vanilla, almond, or orange extract can change the whole vibe of a bar.
These aren’t just about taste—they also bring added fiber, antioxidants, and healthy fats into the mix.
💡 Pro tip: Keep the add-ins to about 1–1.5 cups total per batch to avoid overwhelming the base mixture.
So go ahead—make a cinnamon-raisin bar one week and a coconut-chocolate-chip version the next. No rules, just flavor.
Binding It All Together—Without Eggs or Honey
This is where things can get a little tricky if you’re not paying attention: getting your bars to hold their shape. Since traditional recipes often rely on eggs or honey, vegan versions need smart alternatives.
But don’t worry—it’s not complicated. It’s just about understanding how to use natural, plant-based binders properly.
-
Chia seeds or flax meal: Mix either with water and wait a few minutes. They’ll form a gel that binds everything beautifully, especially for crunchier bars.
-
Date paste or mashed banana: Sweet, sticky, and perfect for no-bake or chewy bars. Bananas also bring a natural mellow flavor.
-
Maple syrup or brown rice syrup: These do double-duty—binding and sweetening at the same time.
The trick is balance. Too much dry stuff and your bars will crumble. Too much wet binder and they’ll be mushy or won’t set.
Here’s a handy quick guide:
| Common Binder | Best For | Suggested Ratio |
|---|---|---|
| Chia seeds (gelled) | Crunchier bars | 1 tbsp seeds + 3 tbsp water |
| Mashed banana | Soft, chewy textures | ½ banana per 1 cup oats |
| Maple syrup | Classic flavor & hold | ¼ cup per batch |
💡 Pro tip: If your bars are too crumbly, try adding a tablespoon of nut butter or an extra splash of syrup before pressing them into the pan.
Once you understand how these ingredients work, you can tweak any recipe with confidence.
Chewy vs. Crunchy: The Texture Debate, Solved
Some people like their bars soft and gooey, others want that crisp bite. No judgment—there’s a method to get both. You just need to know how to control moisture, baking time, and ingredient ratios.
For Chewy Bars
You’re going for soft, bendy, and satisfying—like a dessert without the guilt. Here’s how to get there:
-
No-Bake: Skip the oven entirely. Press the mix into a lined tray, chill, and you’re done.
-
Moist binders: Banana, date paste, and maple syrup are all winners for chewiness.
-
Short baking time: If you do bake, keep it to 15 minutes at 325°F max.
-
Fat content: Ingredients like nut butters or coconut oil help keep the texture soft.
Let them cool before slicing—seriously, don’t rush this. Bars firm up after they rest.
💡 Pro tip: Want even softer bars? Wrap them in parchment after slicing and leave them overnight in an airtight container.
For Crunchy Bars
This is for the texture lovers. The ones who enjoy that “snap” when you bite into something. To get the crunch right:
-
Bake low and slow: 300°F to 325°F for 25–35 minutes gives the perfect dry-out without burning.
-
Use drier ingredients: Less fruit, more nuts, seeds, and puffed grains.
-
Press tight: Really compact the mixture before baking to avoid crumbling.
-
Minimize moisture: Just enough binder to stick it all together—no more.
Be patient post-bake. Let the bars cool completely in the pan before moving or slicing them.
| Crunch Factor Tactics | Best For |
|---|---|
| Longer baking time | Crispy, firm bars |
| Less moisture | Reduces sogginess |
| Nut and seed blends | Adds hearty texture |
💡 Pro tip: Rotate the pan halfway through baking to ensure an even golden finish and balanced crunch.
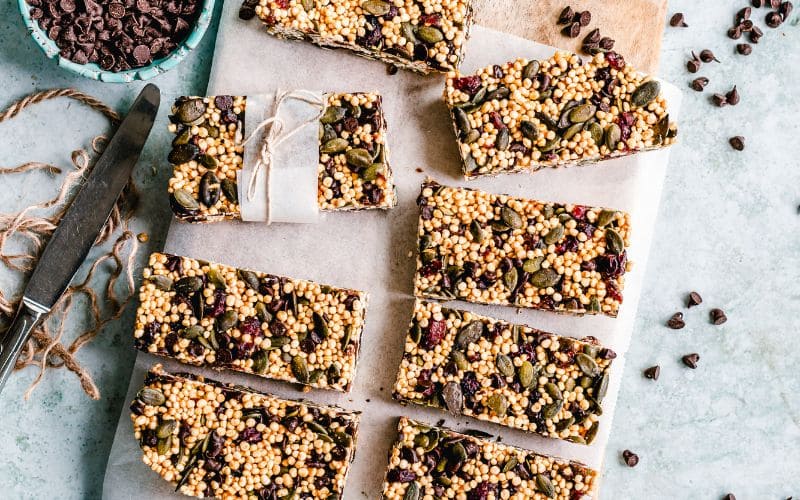
7 Easy Vegan Granola Bars You Can Make at Home
So, you’ve stocked up on oats, picked your nut butter, and cleared a space on the counter. Now what?
It’s time to get creative.
Below are seven granola bar recipes that are as fun to make as they are to eat. No complicated instructions, no obscure ingredients. Just real food, mixed with a little love (and maybe a splash of maple syrup).
Each bar brings its own personality to the table—from tropical to indulgent to protein-packed. Use these recipes as your starting point, then riff off them to suit your mood or what’s hiding in your pantry.
1. Chocolate Chip Almond Bars
This one’s a classic. If you’re trying to win over a skeptical spouse or snack-loving kid, this is the bar that gets them hooked.
What you’ll need:
-
Rolled oats
-
Almond butter
-
Maple syrup
-
Chopped almonds
-
Vegan chocolate chips
-
Vanilla extract
How to make them:
Mix everything in a bowl until you’ve got a nice sticky mess. Press into a lined baking tray, refrigerate for 2–3 hours, then slice into squares. They’re rich, soft, and just a little indulgent.
💡 Pro tip: Toast the almonds beforehand to deepen their flavor and add extra crunch.
2. Date and Coconut Bars
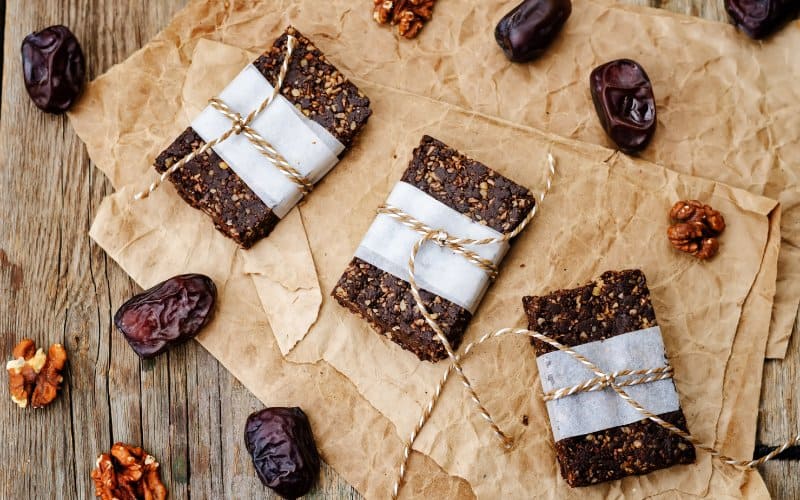
Imagine taking a bite of something that tastes like vacation. That’s what these bars deliver—sweet, chewy, and lightly tropical.
What you’ll need:
-
Medjool dates (pitted and soaked)
-
Shredded coconut
-
Rolled oats
-
Coconut oil
-
Chia seeds
How to make them:
Blend the soaked dates into a smooth paste. Stir in the rest, press into a tray, and refrigerate. That’s it. No oven needed, just a chill session.
💡 Pro tip: Don’t skip soaking the dates—they blend better and bind your bars more effectively.
3. Peanut Butter Protein Bars
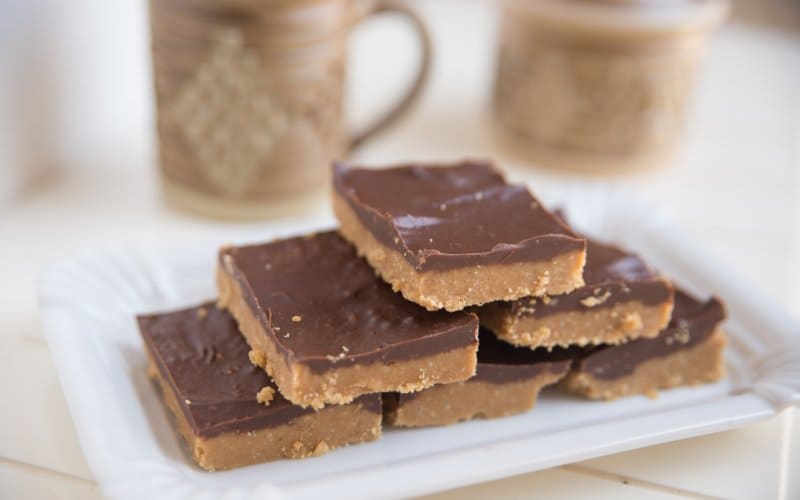
Need a post-gym snack? These bars are your best friend. They’re hearty, rich, and won’t leave you reaching for more in an hour.
What you’ll need:
-
Peanut butter
-
Rolled oats
-
Maple syrup
-
Vegan protein powder
-
Flaxseed meal
-
(Optional) Dairy-free chocolate chips
How to make them:
Mix your dry and wet ingredients together until you’ve got a thick, moldable mix. Press into a pan, refrigerate, and slice when firm. Wrap them individually and toss one into your gym bag for a snack that actually earns its place.
💡 Pro tip: Use unflavored or vanilla protein to avoid overpowering the natural peanut flavor.
4. Pumpkin Spice Oat Bars
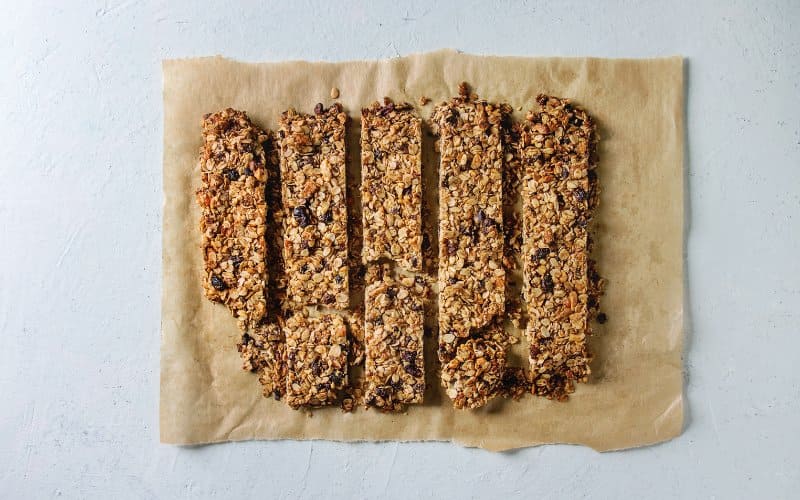
Who says pumpkin is just for autumn? These bars deliver cozy, spiced comfort year-round. Soft, warm, and just the right amount of sweet.
What you’ll need:
-
Rolled oats
-
Pumpkin purée
-
Maple syrup
-
Cinnamon, nutmeg, cloves
-
Sunflower seeds
-
Vanilla extract
How to make them:
Mix all ingredients and choose your adventure: Bake at 325°F for 25 minutes for a firmer bite, or chill them for a softer, dessert-like texture. Add cranberries or raisins for an extra pop.
💡 Pro tip: Swap in pecans for sunflower seeds if you want a rich, buttery crunch.
5. Matcha Pistachio Bars
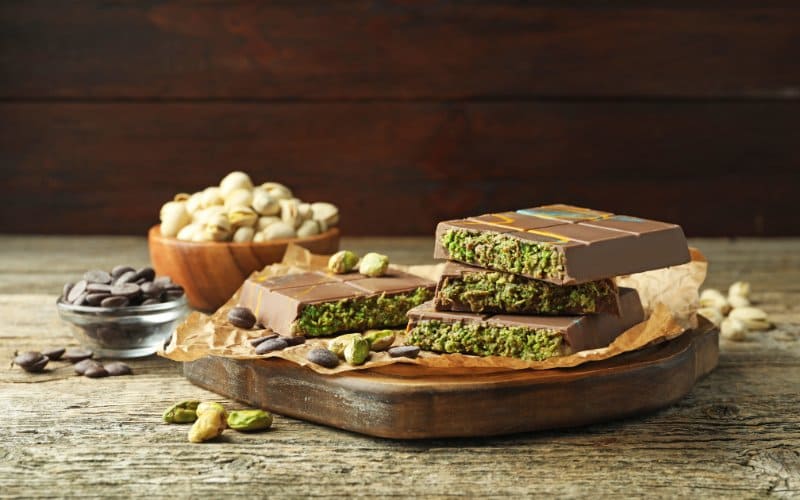
These bars feel fancy. Earthy matcha, crunchy pistachios, and creamy nut butter—it’s an antioxidant-rich combo that’s hard to beat.
What you’ll need:
-
Rolled oats
-
Pistachios (chopped)
-
Matcha powder
-
Cashew butter or tahini
-
Maple syrup
-
Coconut flakes
How to make them:
Stir everything together, press into a tray, and freeze for 1–2 hours. They firm up quickly and stay fresh in the freezer for days.
💡 Pro tip: Add a pinch of sea salt to enhance the sweetness and bring out the matcha flavor.
6. Cranberry Orange Bars
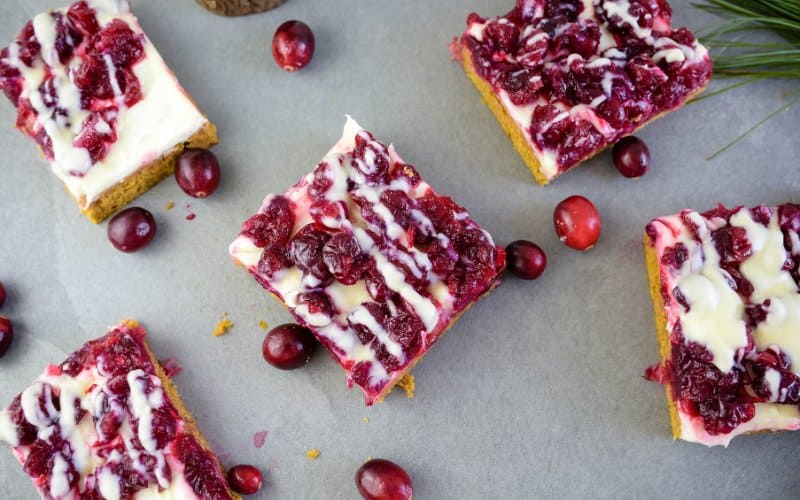
A fresh burst of citrus paired with the zing of cranberries—perfect for holiday gatherings or a mid-week pick-me-up.
What you’ll need:
-
Rolled oats
-
Dried cranberries
-
Orange zest and juice
-
Almond butter
-
Maple syrup
How to make them:
Combine, bake lightly for 15 minutes at 325°F to meld the flavors, then let them cool. These bars firm up well and taste even better the next day.
💡 Pro tip: Use unsweetened cranberries if you want a sharper, less sugary flavor balance.
7. Nut-Free Seed Mix Bars

Need something school-safe? These nut-free bars are chewy, crunchy, and allergen-friendly. They don’t compromise on flavor or texture.
What you’ll need:
-
Rolled oats
-
Sunflower and pumpkin seeds
-
Sunflower seed butter
-
Brown rice syrup
-
Flaxseed meal
-
Raisins or dried apricots
How to make them:
Mix, press, chill, or bake lightly—your call. They’re sturdy, satisfying, and a great way to get picky eaters on board.
💡 Pro tip: Add a dash of cinnamon to give these bars a cookie-like aroma and flavor.
Customizing Your Granola Bars
Let’s say you’ve mastered the basics—but now you want to tweak things. Maybe someone in your house is gluten-free. Maybe you want a little less sugar. Good news: with homemade bars, you’re the boss of every ingredient.
How to Adjust Recipes to Suit Your Diet
Here’s how to swap ingredients without sacrificing taste or texture:
| Dietary Need | Swap Suggestions |
|---|---|
| Gluten-Free | Certified GF oats, puffed rice, quinoa flakes |
| Low-Sugar | Date paste, banana, monk fruit |
| High-Protein | Hemp seeds, flax meal, vegan protein powder |
| Low-Fat | Applesauce, mashed pumpkin, tahini |
-
Going gluten-free? Choose certified GF oats or go creative with quinoa flakes.
-
Cutting sugar? Skip the syrup and opt for mashed banana or monk fruit.
-
Want more protein? Add hemp hearts or a scoop of powder into the mix.
-
Lowering fat? Applesauce or pumpkin purée offers moisture without heaviness.
💡 Pro tip: Adjust sweeteners and nut butters slowly—too much change at once can affect how the bars hold together.
Mix-and-Match Ideas for Endless Combos
Once you understand the formula, the real fun begins. Start experimenting with your own blends using these ideas:
-
Berry Bliss: Dried blueberries, chopped almonds, vanilla extract
-
Tropical Sunrise: Shredded coconut, dried pineapple, cashew butter
-
Apple Pie: Diced dried apples, cinnamon, raisins
-
Choco-Cherry: Dried cherries, cacao nibs, almond butter
-
Spicy Walnut: Chopped walnuts, ginger powder, molasses
Want more ideas? Open your spice drawer or raid your fruit bowl—unexpected combos often turn into favorites.
💡 Pro tip: Pair chewy fruits with crunchy seeds or nuts to balance textures and avoid soggy bars.
Tips for Storing and Keeping Granola Bars Fresh
So, you’ve nailed the recipe. Your kitchen smells amazing. You’ve got a tray of golden, chewy (or crunchy) vegan granola bars cooling on the counter. Now the question is—how do you keep them fresh?
Good news: they’re built for storage. Whether you’re prepping ahead for a busy week, stocking up for hikes, or just trying to avoid the daily snack scramble, a little planning goes a long way.
Room Temperature vs. Fridge vs. Freezer
Different storage methods = different shelf lives and textures. It all depends on how long you want to keep them and how you like your bars—soft and chewy, or a bit firmer with bite.
Here’s a quick rundown:
| Storage Method | Shelf Life | Best For |
|---|---|---|
| Room Temperature | 5–7 days | Quick snacks, lunchboxes |
| Refrigerator | 2–3 weeks | Moist climates, softer bars |
| Freezer | Up to 3 months | Bulk prepping, long-term storage |
-
Room Temp: Pop them into an airtight container. Keep them in a cool, dry place. Layer with parchment to stop them sticking together.
-
Refrigerator: Ideal for humid days or softer bars. They stay firmer and taste fresh longer.
-
Freezer: Wrap individually in parchment or foil, then toss them into a freezer-safe bag. When you’re ready to snack, thaw overnight—or eat them straight from the freezer for a firm, fudgy texture.
💡 Pro tip: Label your freezer bags with the date and flavor—your future self will thank you.
Prepping for Meal Plans or Travel
These bars were made for the “grab-and-go” life.
Whether you’re running late for school drop-off, sprinting to a meeting, or catching a red-eye flight, having a stash of ready-made granola bars makes things easier (and cheaper) than reaching for a vending machine option.
Here’s how to stay ahead:
-
Wrap individually: Use beeswax wraps, reusable snack bags, or foil. Keeps things neat and eco-friendly.
-
Batch and freeze: Make a double batch, freeze half. Your future snack game just leveled up.
-
Portion control: Cut evenly so you don’t overdo it—or under-snack and regret it an hour later.
💡 Pro tip: Slice smaller bars for kids or quick pre-workout fuel, and larger bars for meal-replacement style snacking.
Kid-Friendly and Allergen-Free Options
Getting kids to eat healthy snacks can feel like an Olympic event. But it doesn’t have to be.
Vegan granola bars can be made kid-approved, allergen-safe, and still totally delicious. It’s all about the right swaps—and a little creativity.
Making Bars Safe for School Lunches
Peanut bans? Tree nut restrictions? No problem. You can still pack protein and flavor without the worry.
-
Nut-Free Butters: Try sunflower seed butter or tahini—creamy, satisfying, and school-approved.
-
Allergen-Safe Chocolate: Look for certified vegan, nut-free chocolate chips.
-
Seed Substitutes: Swap chopped nuts for crunchy pumpkin seeds, flax, or hemp.
Label clearly if you’re sending them in lunchboxes. A simple sticker or note can help teachers and staff feel confident about what’s inside.
💡 Pro tip: Use different colored wrappers to help kids remember which flavor is which—saves snack-time meltdowns.
Tips for Picky Eaters
Let’s be real. Kids have opinions. Sometimes strong ones.
The healthiest bar won’t do a thing if it comes back untouched. Try these hacks to get little hands reaching for more:
-
Use mild flavors like applesauce, oats, and coconut.
-
Add a swirl of melted dairy-free chocolate or a dusting of cinnamon sugar.
-
Cut into shapes using cookie cutters—hearts, stars, dinosaurs… whatever gets the job done.
-
Get them involved. Let them pour, mix, or press the mixture into the pan. They’ll be more excited to eat what they helped create.
💡 Pro tip: Blend seeds like flax and hemp into the mix to boost nutrition without visible “weird bits.”
Homemade vs. Store-Bought Granola Bars
You’ve probably seen endless vegan snack bars lining grocery store shelves. Slick packaging. Buzzwords. But are they really better?
Let’s break it down.
Cost Comparison
Making your own bars is not only better for your health—it’s better for your wallet.
| Type | Average Cost Per Bar |
|---|---|
| Homemade | $0.40 – $0.70 |
| Store-Bought Vegan | $1.50 – $2.50 |
Buy oats, seeds, and fruit in bulk and you’ll bring that cost down even more. Plus, you’re not paying for branding or plastic.
💡 Pro tip: One big bag of oats makes 30+ bars—stock up once, snack for weeks.
Nutritional Comparison
With homemade bars, you’re in control:
-
Adjust sweetness
-
Add more protein
-
Skip preservatives
-
Choose your fiber sources
Most store-bought bars include cane sugar, syrup blends, or mystery binders. Homemade means no surprises—and no compromise.
Environmental Impact
Every time you skip a plastic-wrapped snack bar, you do the planet a small favor.
-
Less single-use plastic
-
No need for long-distance shipping
-
Easy to store in reusable containers or wraps
It’s a small habit that can have a big impact over time.
Common Mistakes to Avoid When Making Vegan Granola Bars
Let’s be honest—sometimes a batch just doesn’t turn out. Here’s what usually goes wrong and how to fix it next time.
Bars Falling Apart
-
Too many dry ingredients or not enough binder.
-
Didn’t press them down firmly.
-
Skimped on the chilling or baking time.
Fix it:
Stick to a 1:2 wet-to-dry ratio. Really press the mixture into the pan. Give them time to set fully before slicing.
Too Hard or Too Soft
-
Overbaked = rock solid.
-
Underbaked or too much syrup = mush city.
Fix it:
Time your bake. Chill thoroughly. And let them cool before cutting—this matters more than people think.
Flavor Is Bland or Off
-
Missing salt
-
No spices
-
Texture too one-note
Fix it:
Add a pinch of sea salt, a splash of vanilla, or a dusting of cinnamon. Combine chewy fruits with crunchy nuts or seeds for balance.
💡 Pro tip: Taste your mix *before* baking or chilling—you can adjust flavors while it’s still flexible.
Conclusion
Vegan granola bars are more than just a wellness trend—they’re your new secret weapon for eating well, saving time, and staying full between meals.
Whether you’re chasing protein, managing food allergies, or just want something you can trust to actually taste good, there’s a version of these bars that’s right for you.
Make them your own. Wrap them up. Toss one in your bag and go.
Once you get the hang of it, those store-bought snack bars won’t even tempt you anymore.
💡 Pro tip: Start with a basic recipe, master the balance, then play with flavors to match your mood or season.